Projects / Open weather station
An open weather station and all-sky camera for robotic telescopes
2024 – present · built for the ROTSE-IIIc telescope in Namibia · enclosure designed in Fusion 360 · Raspberry Pi Pico and MicroPython · circuit board designed in KiCad
A robotic telescope has to decide for itself whether it is safe to open, so it needs to know the wind, humidity, temperature and pressure outside, and whether there is cloud overhead. Commercial observatory weather stations are expensive, so while working on the revival of the ROTSE-IIIc telescope in Namibia I built a monitoring suite that anyone can copy: a 3D-printed weather station, a custom all-sky camera, and open firmware and electronics. Its telemetry is what the observatory's control system reads when it decides whether to open the roof.
The enclosure
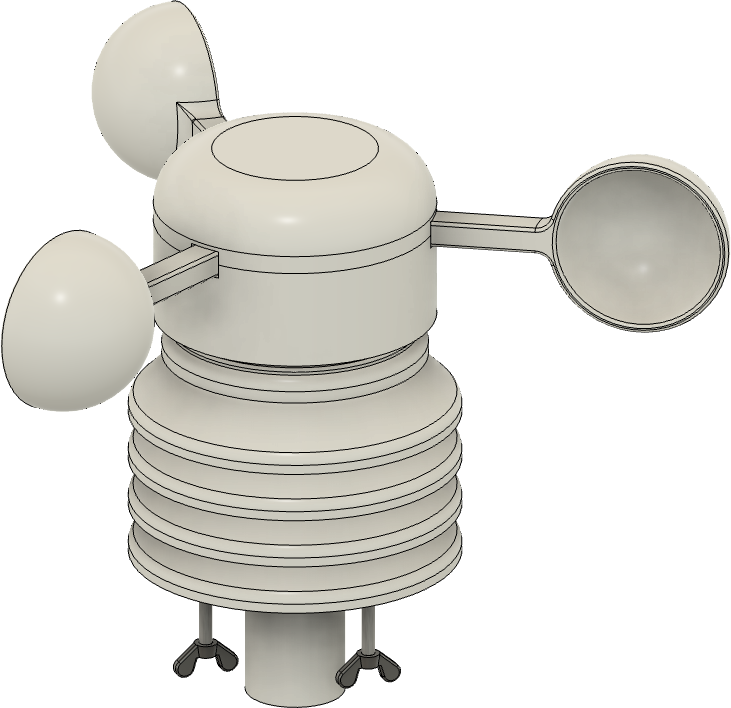
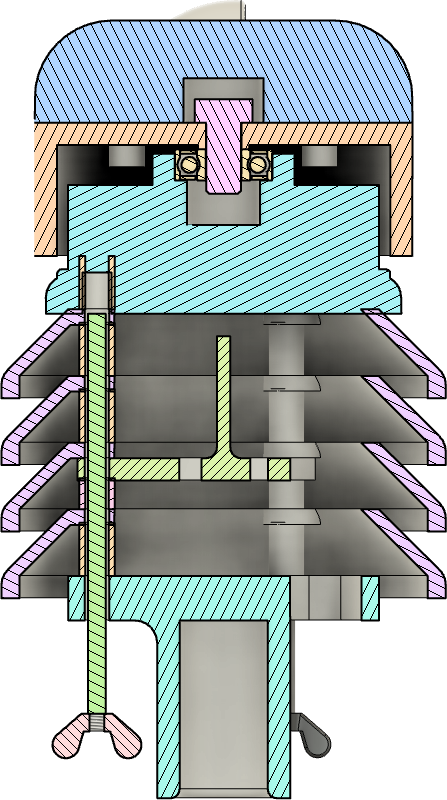
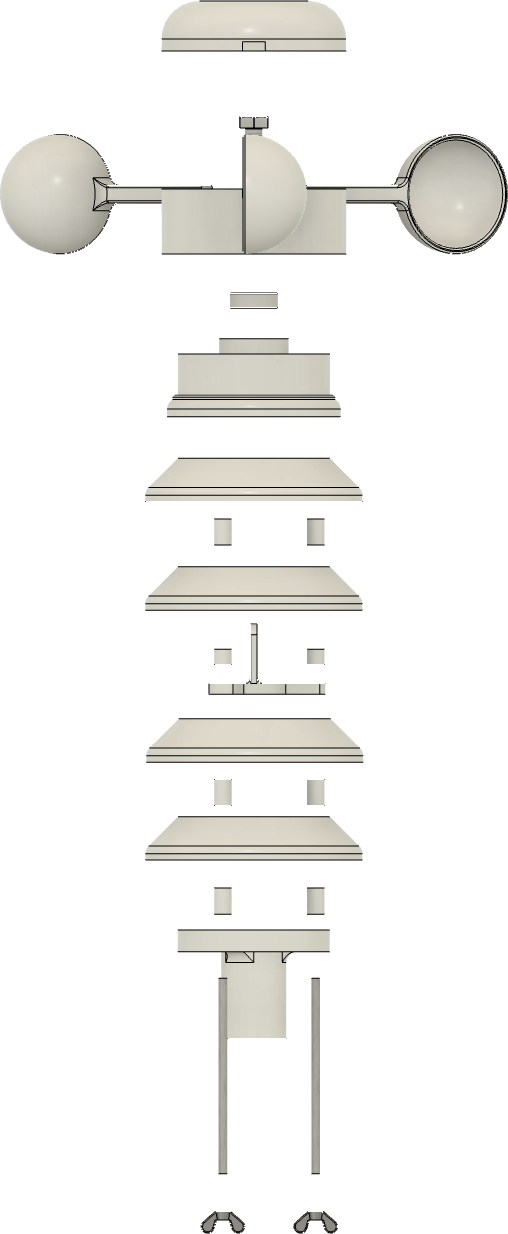
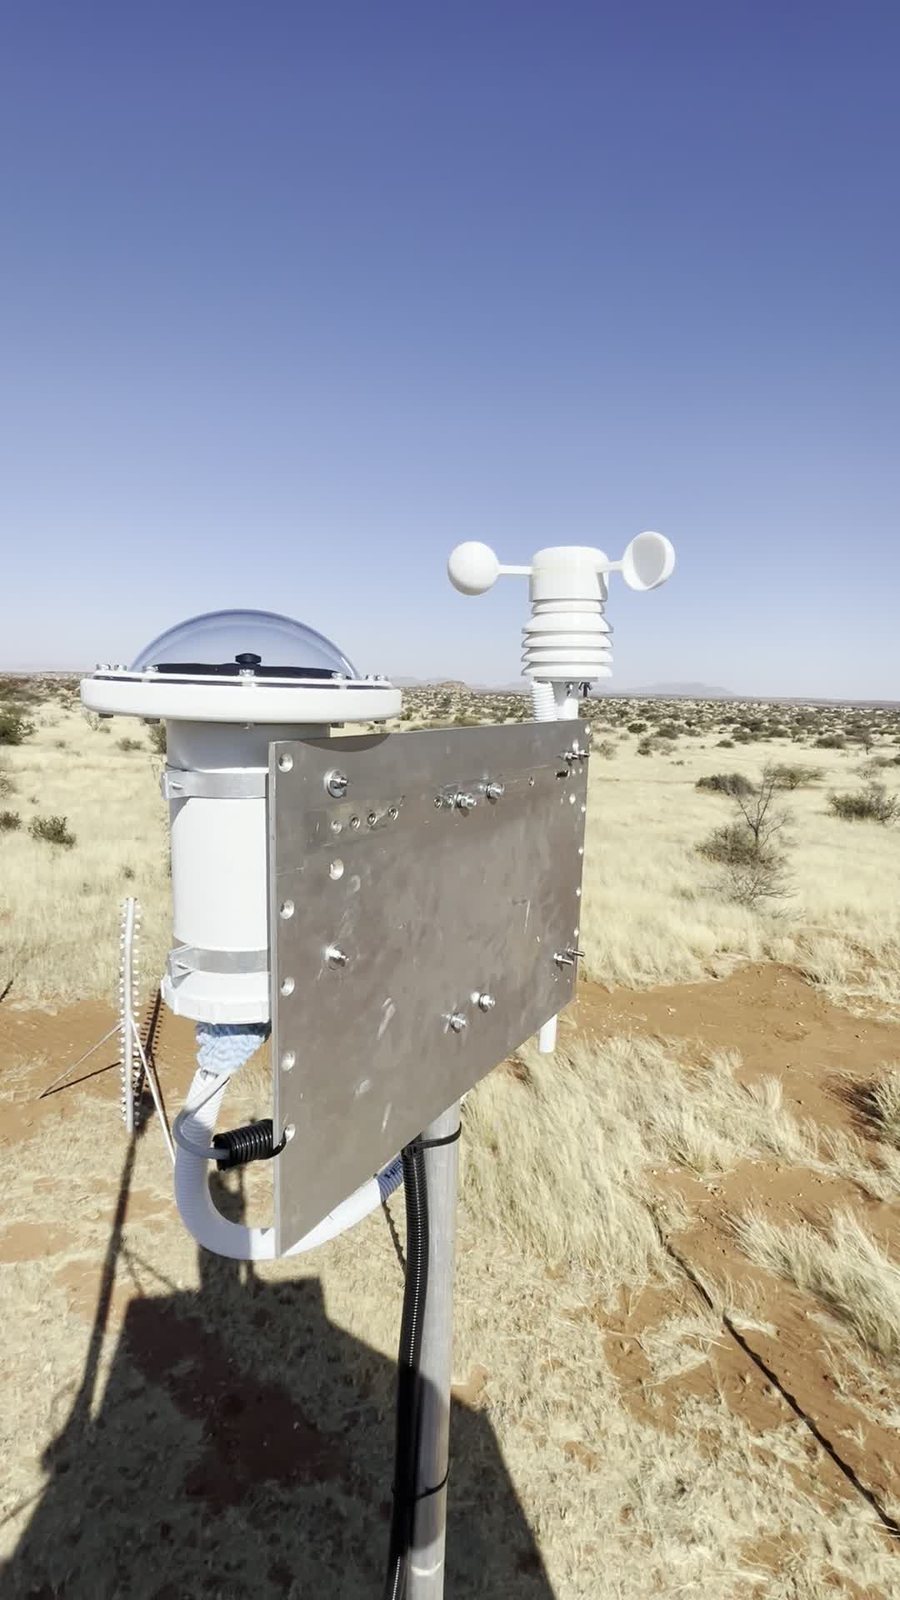
The enclosure is 3D-printed in PLA or PETG. The temperature and humidity sensor sits inside a stack of four radiation screens, which shade it from direct sun while letting air flow past, and three steel rods with wing nuts hold the stack together. On top, a three-cup anemometer turns on a permanently lubricated ball bearing on an M8 bolt, with small magnets in the rotor that pass a Hall-effect sensor as it spins. The roof takes heat-set threaded inserts, and the whole station comes apart for maintenance.
Electronics and firmware
The first version runs on a Raspberry Pi Pico with an AHT20 and BMP280 sensor board and an A3144 Hall-effect sensor, wired on a small prototyping board and connected to the sensor head by a 6-core cable with plug-in connectors. I wrote the firmware in MicroPython, including the drivers for both sensors:
- Wind speed comes from counting the magnet's pulses in an interrupt, with debouncing against mechanical noise. The count is turned into a speed using the rotor's circumference and an empirical calibration factor, then smoothed with a rolling average.
- Temperature is the average of the AHT20 and BMP280 readings, alongside humidity and pressure.
- Robustness: every reading is range-checked and retried if it fails, errors are reported explicitly rather than as plausible-looking numbers, and a watchdog restarts the board if it ever hangs.
Every three seconds the station prints one line over USB:
T:temperature H:humidity P:pressure WS:wind_speed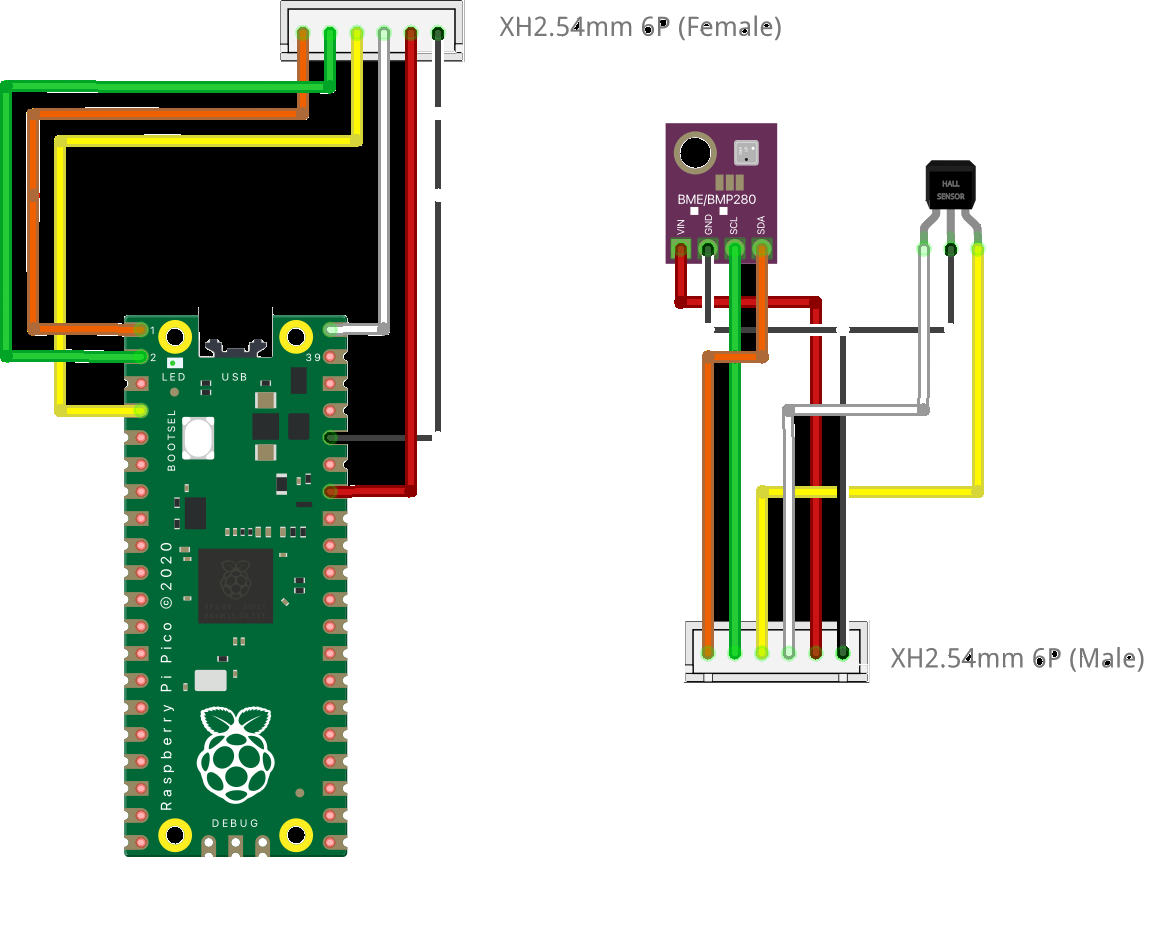
In the field
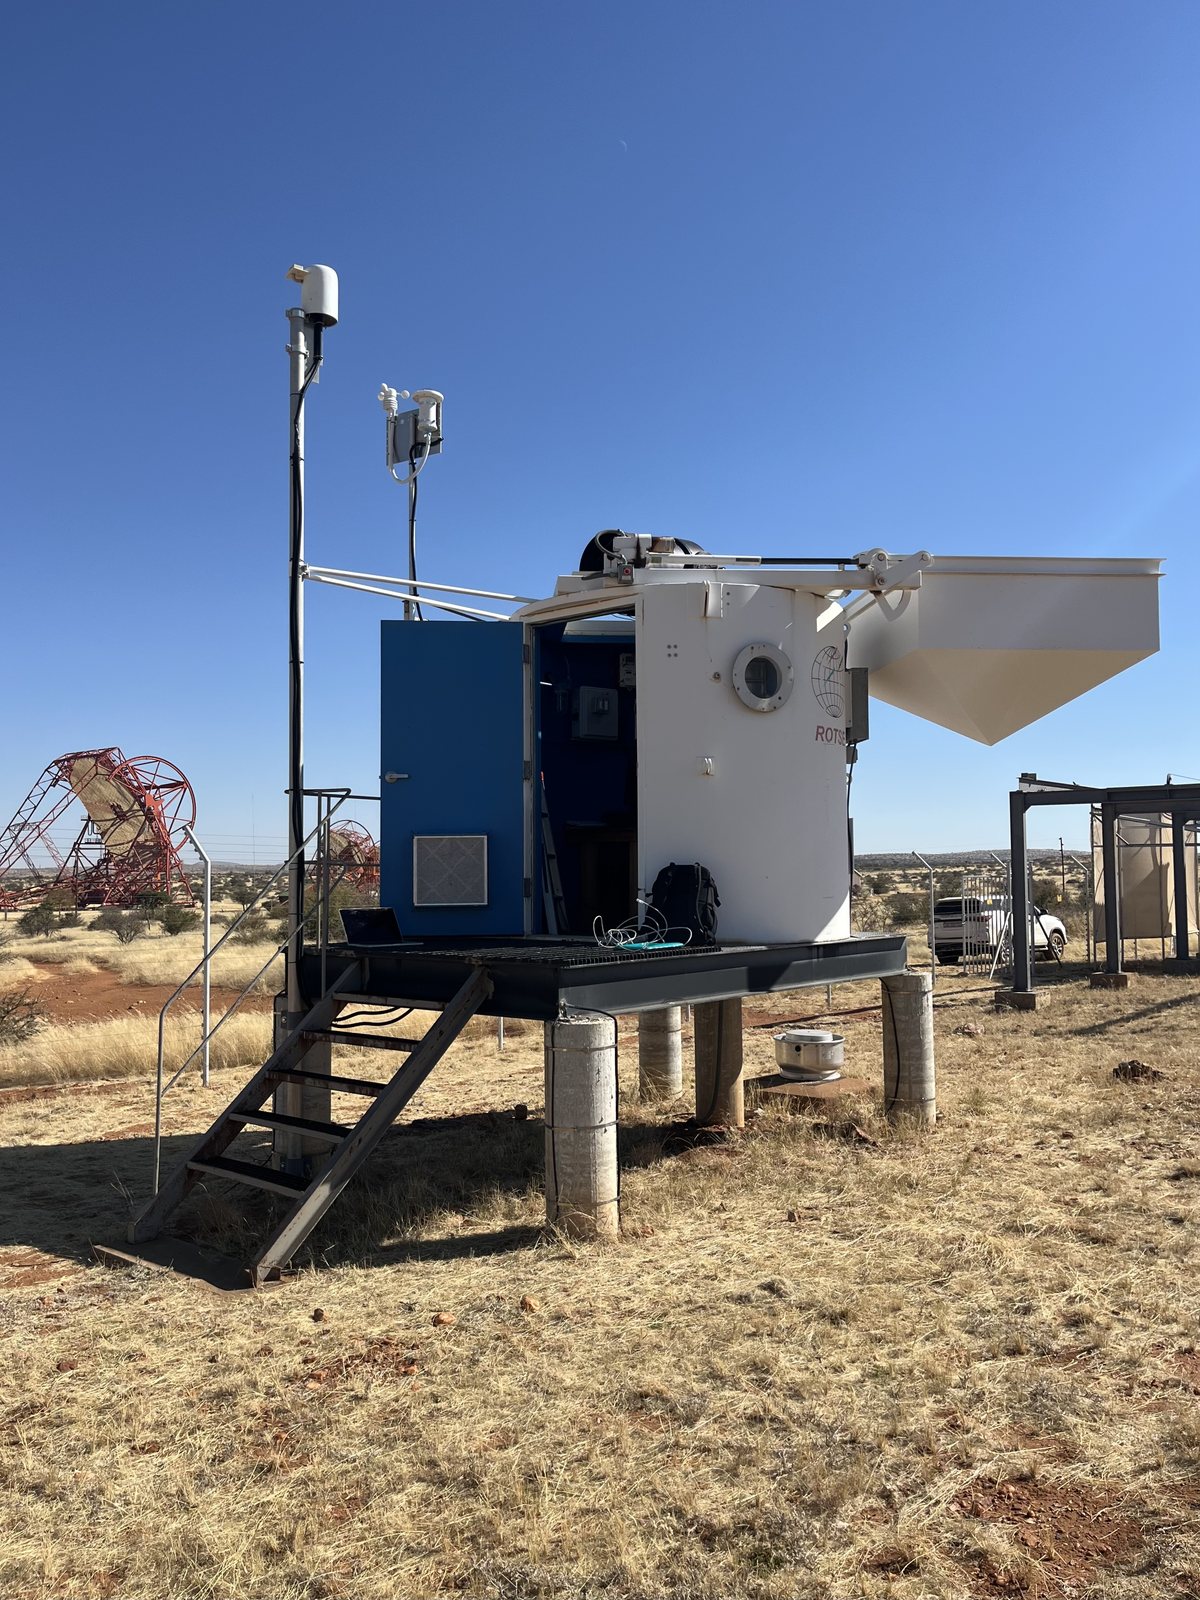
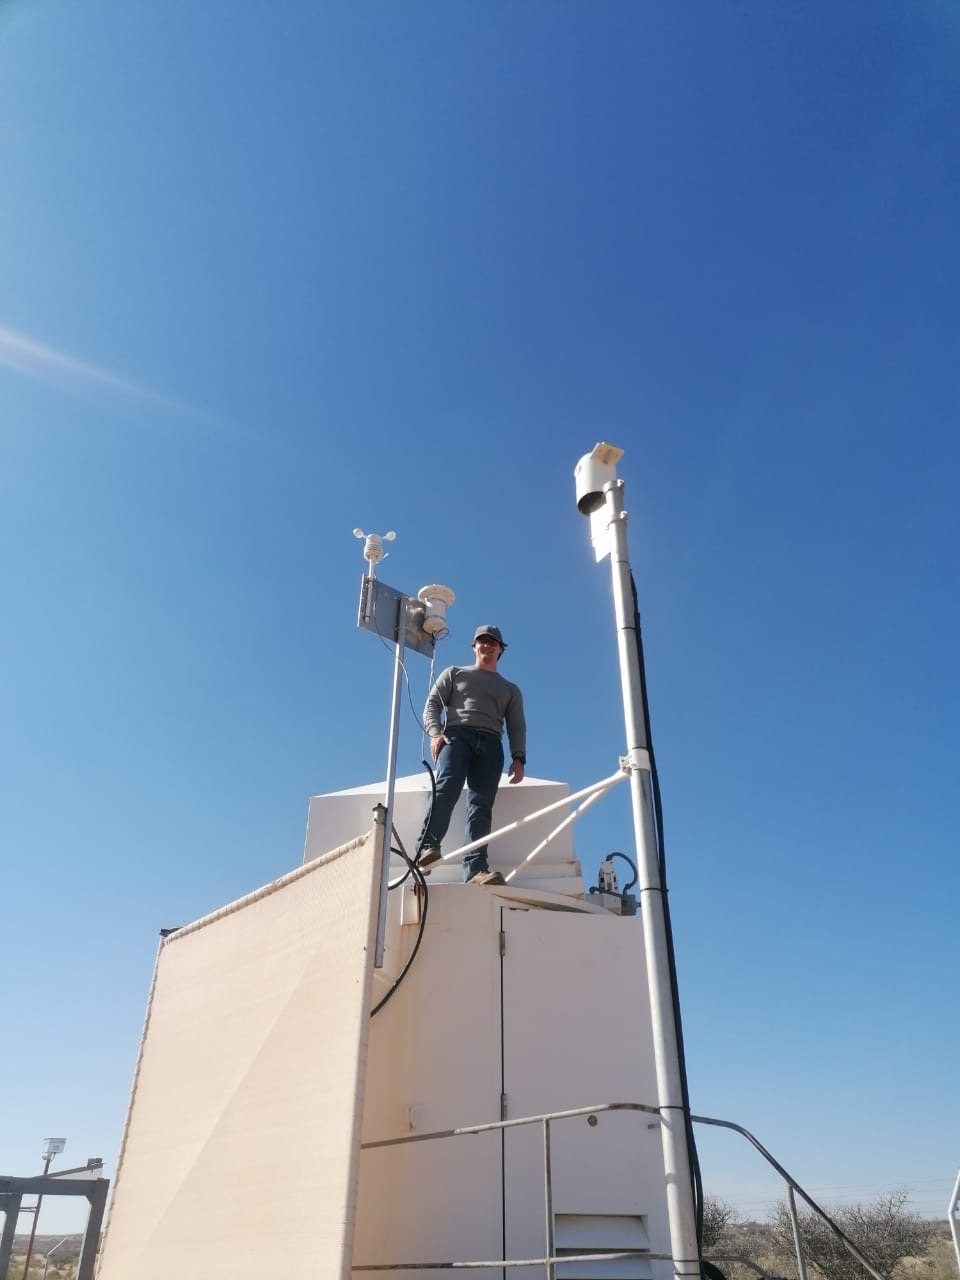
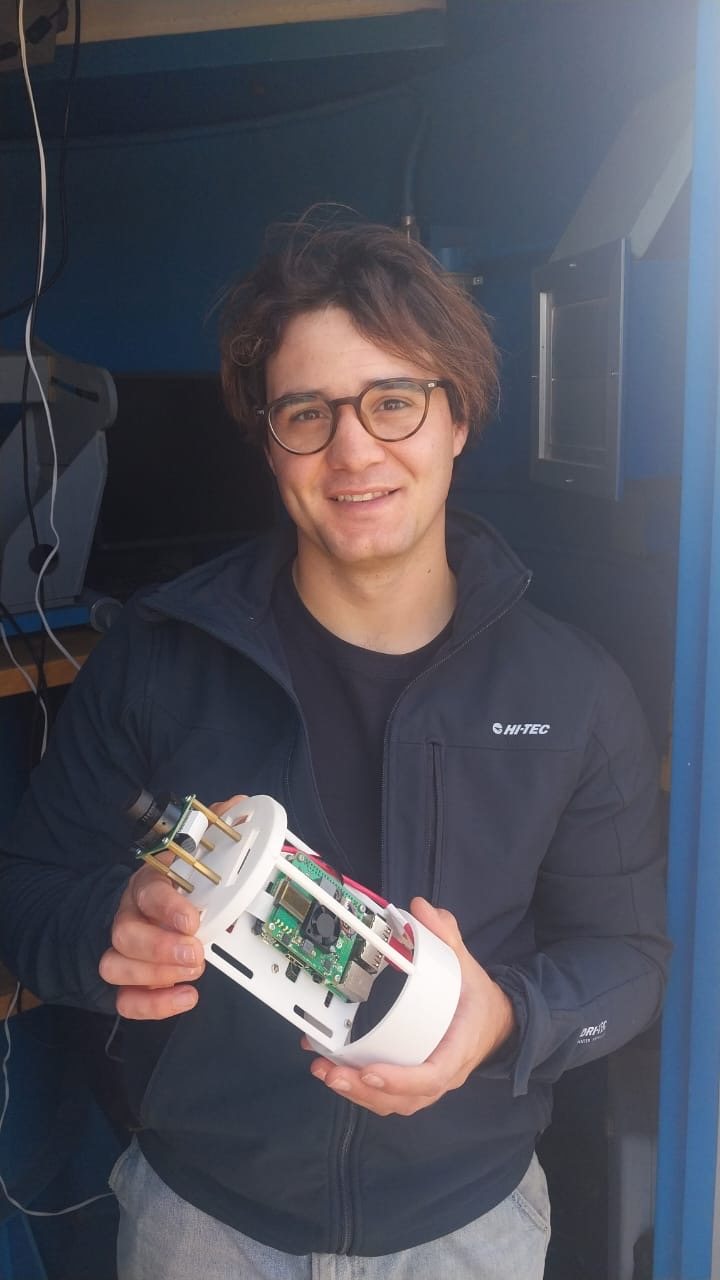
The station has been running on the roof of the ROTSE-IIIc enclosure in Namibia, on a mast alongside the first version of an all-sky camera I built to watch for cloud: a 12.3-megapixel Sony IMX477R sensor behind a 120° lens, in a 3D-printed weatherproof housing under a clear dome. Together the two cost under €200.
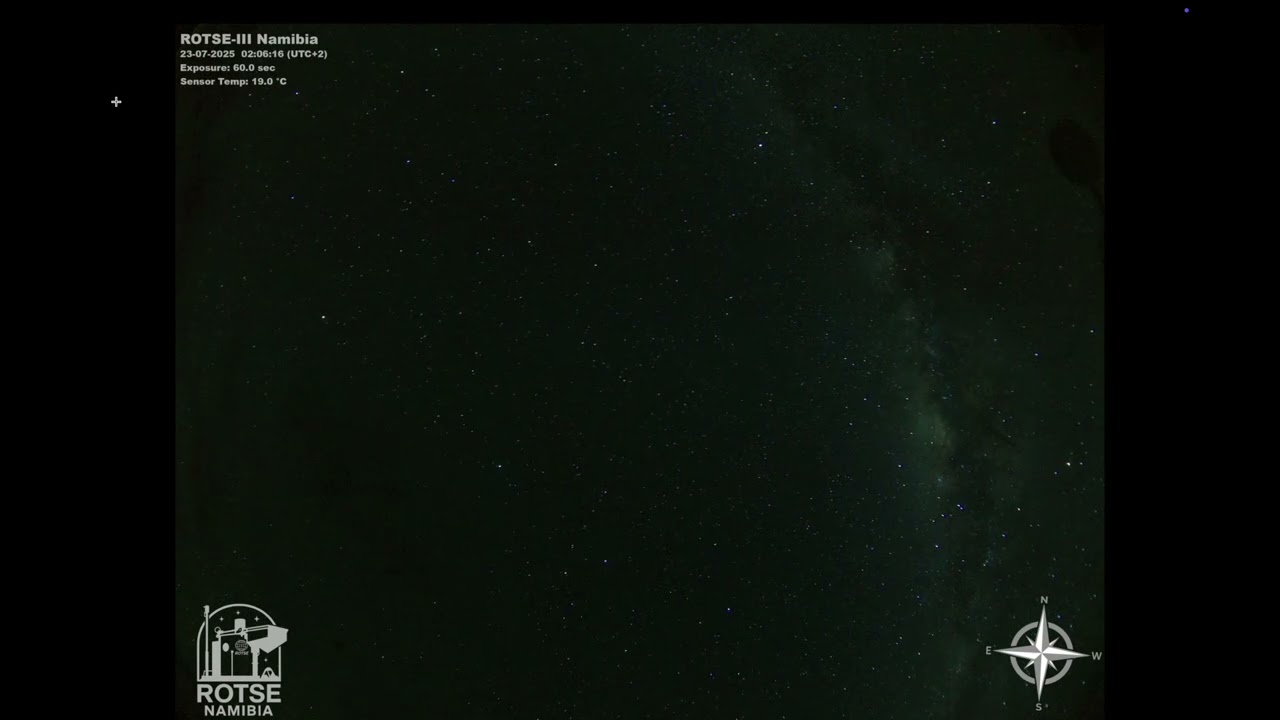 Watch the all-sky camera timelapse on YouTube
Three months of data
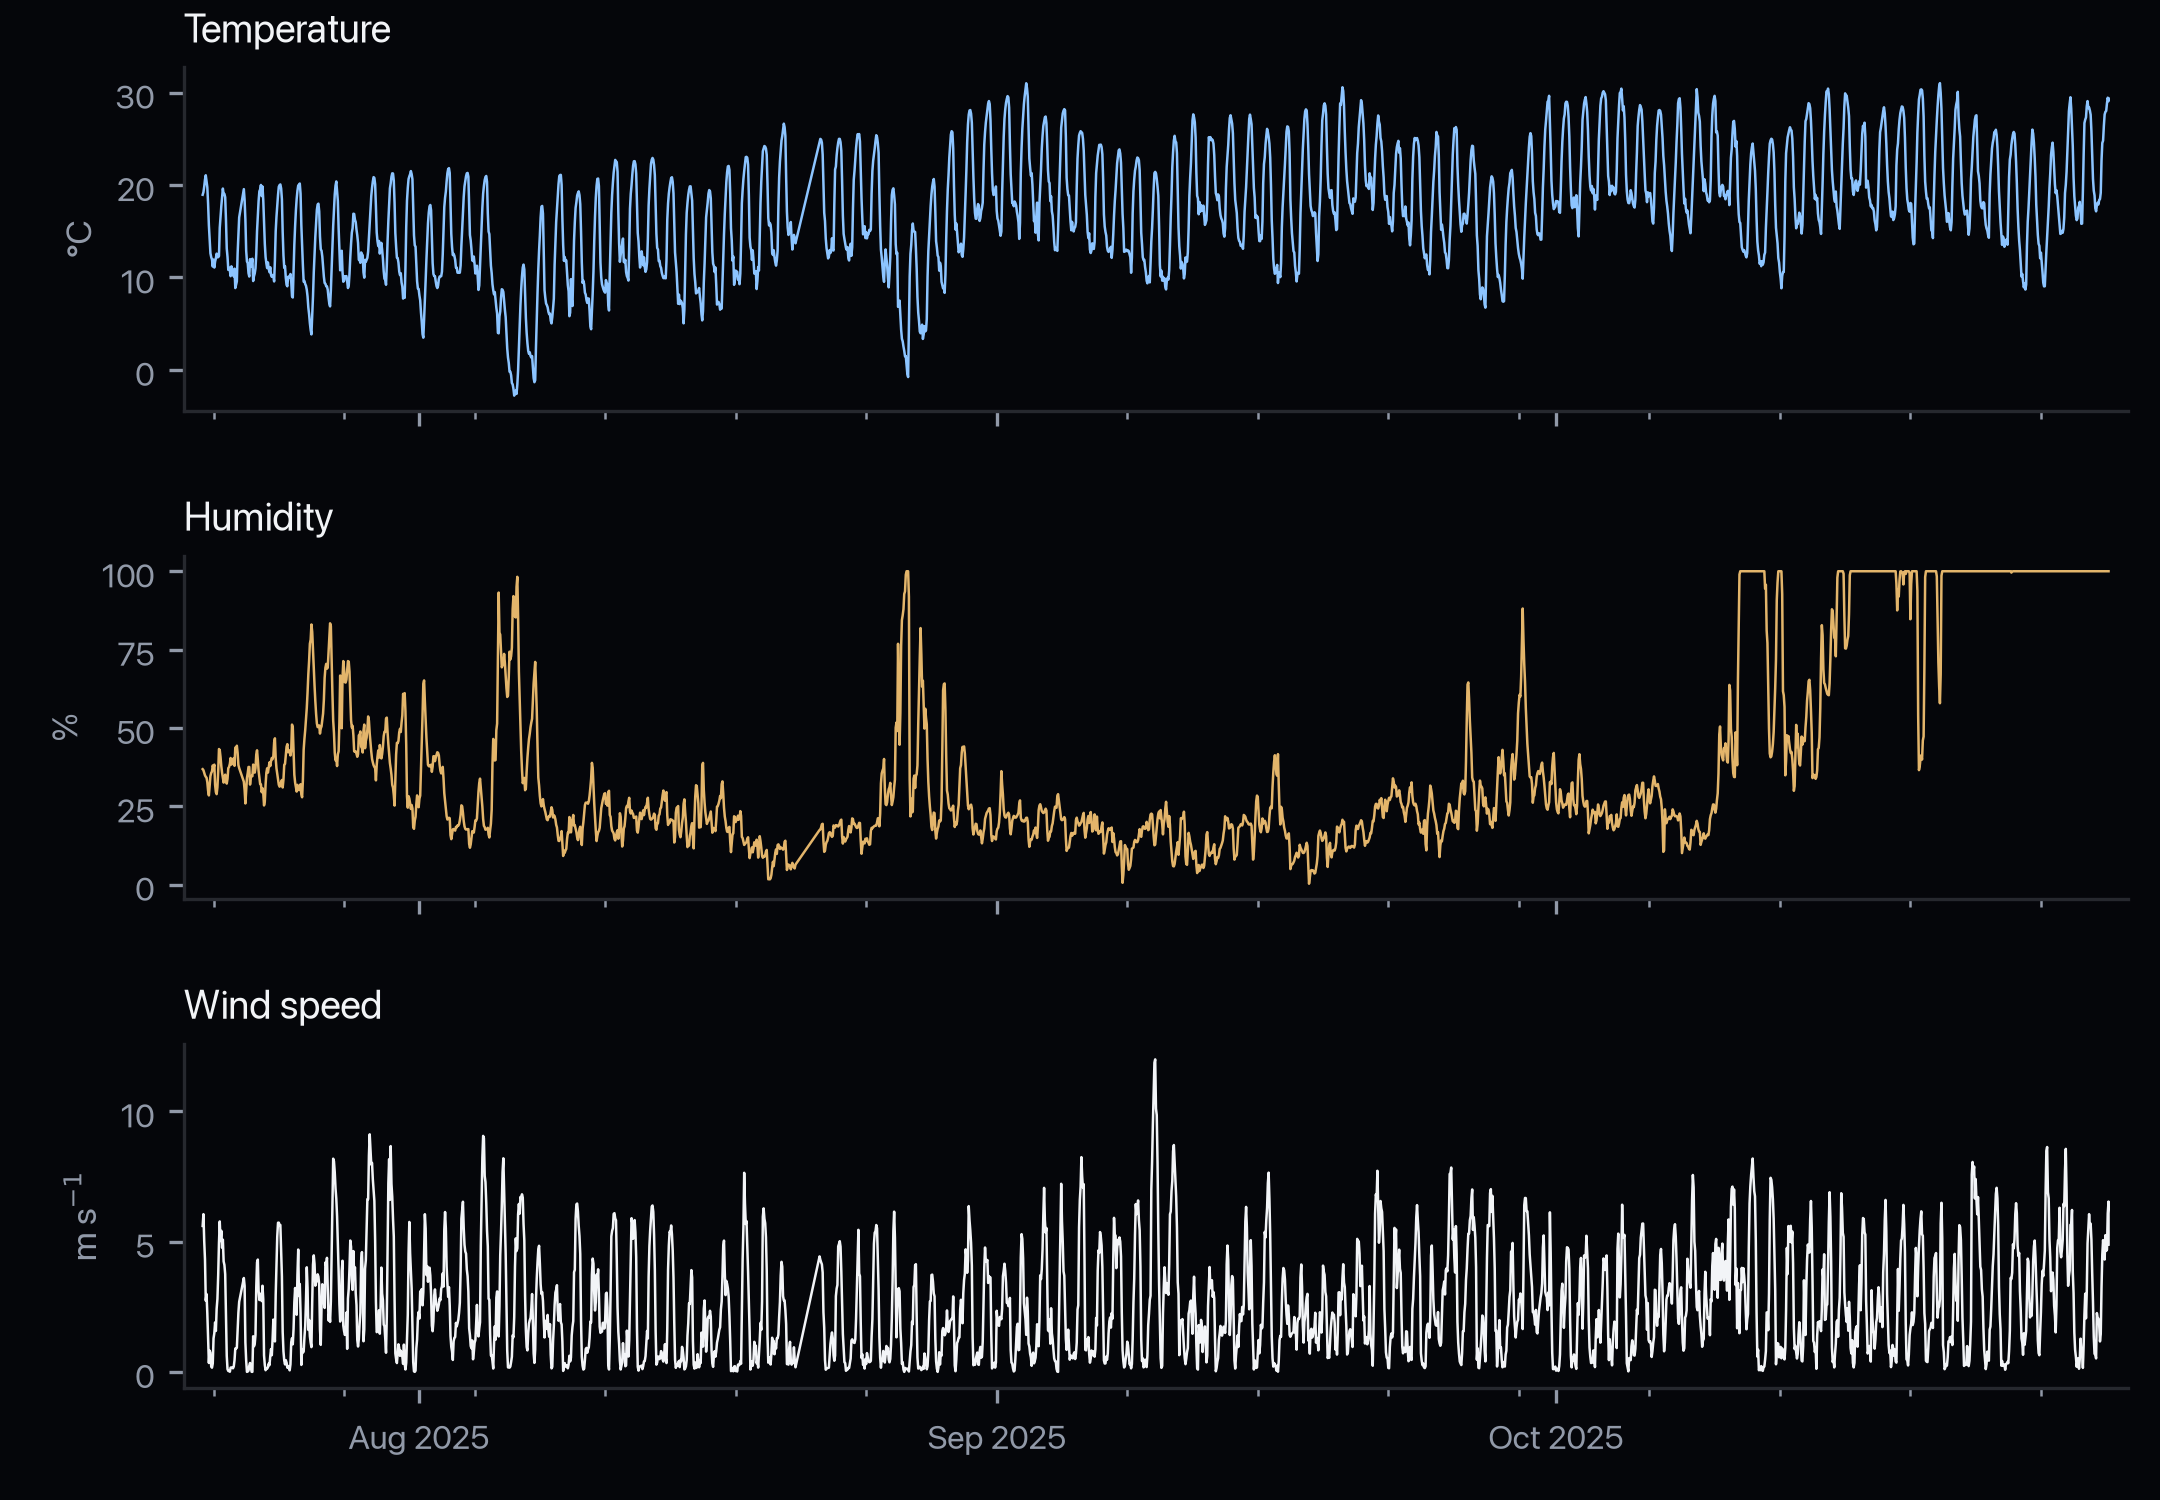
Between 20 July and 30 October 2025 the station returned hourly averages with 98.5% coverage. Temperatures ran from −2.8 to 31 °C, with the sharp day-night swing of a desert site, and the wind reached 12 m s-1 (43 km/h). The mean pressure of 811 hPa is what the site's altitude implies.
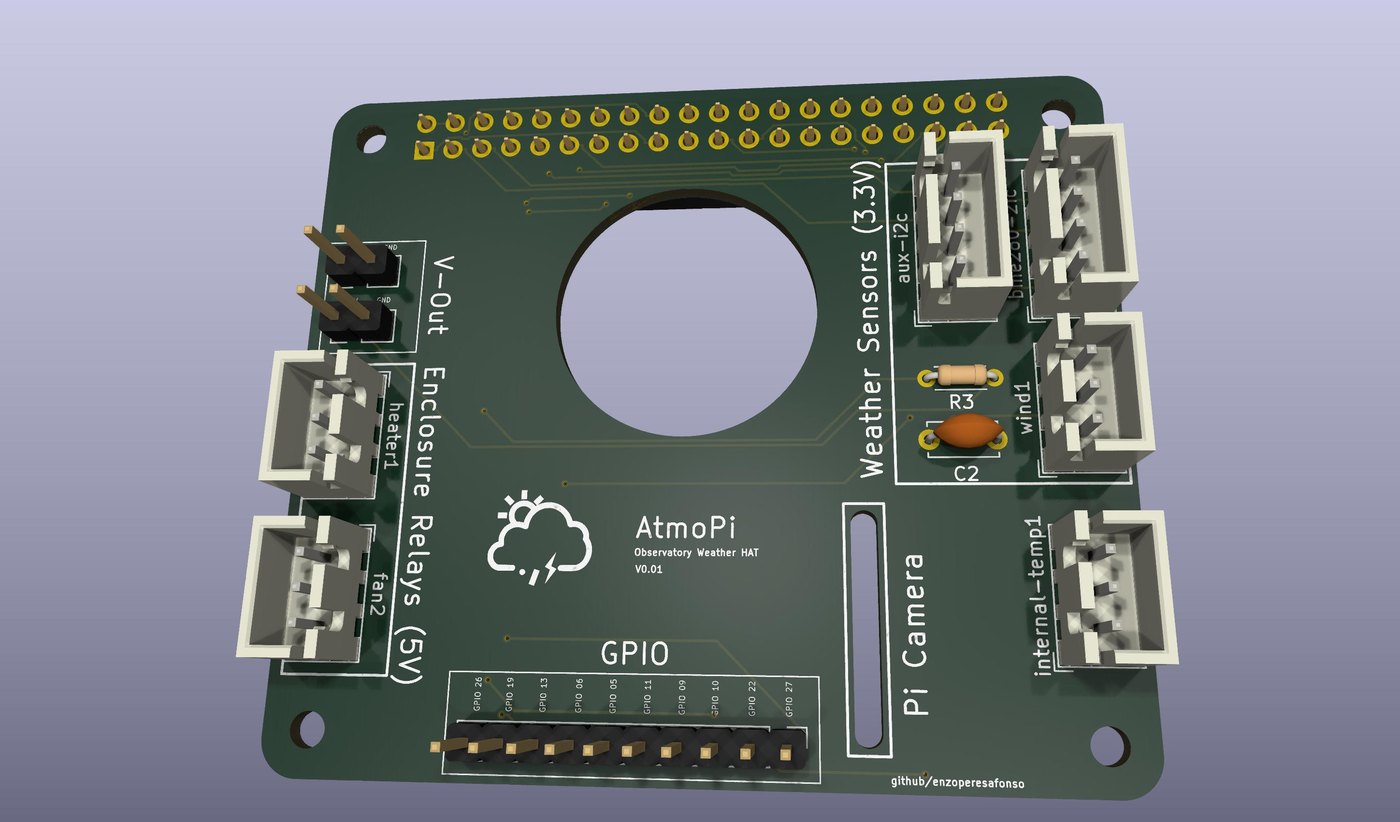
Version 2: AtmoPi
The next version replaces the prototyping board with a custom circuit board I designed in KiCad: AtmoPi, a board that plugs straight onto a Raspberry Pi. It has connectors for a BME280 sensor, the anemometer and an internal temperature sensor, relays to switch a fan and a heater, and a slot for a Raspberry Pi camera, so one board can run both the weather sensors and the all-sky camera. The design is open source under the MIT licence.